Map Workshop Official Tutorial
2025/07/31Preface
Welcome to the DIY Map feature in the Construction Mode of Strinova ("the Game"), provided by DreamSky Technology Limited (Shenzhen). To maintain a positive gaming environment and ensure an excellent experience for all players, please carefully review the following guidelines before using this feature:
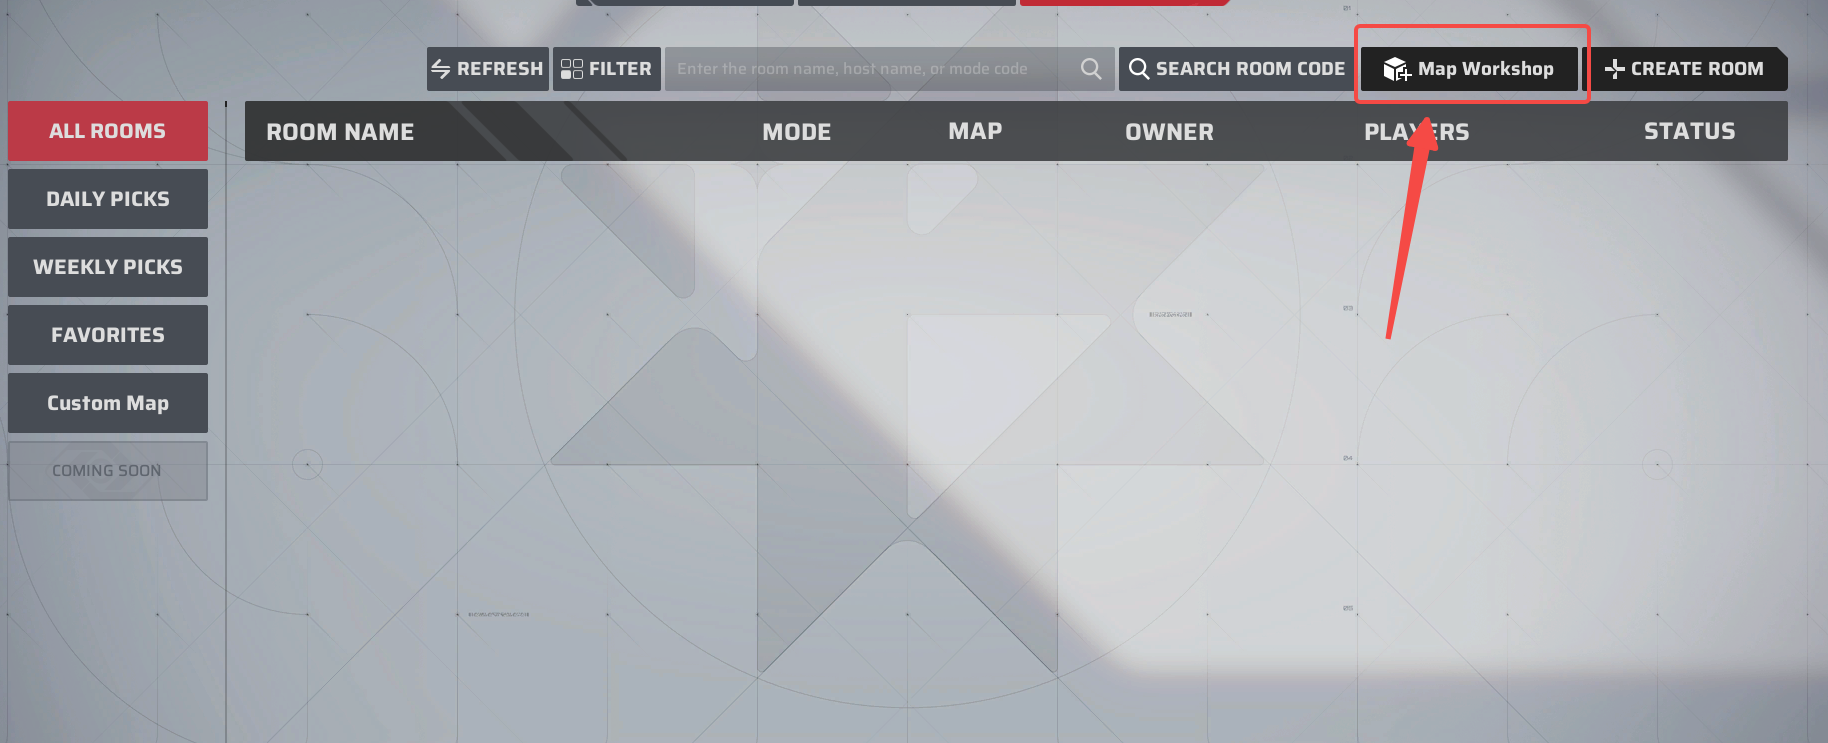
I. Map Workshop Entrance
- Click [CUSTOM] → [Map Workshop] to enter.
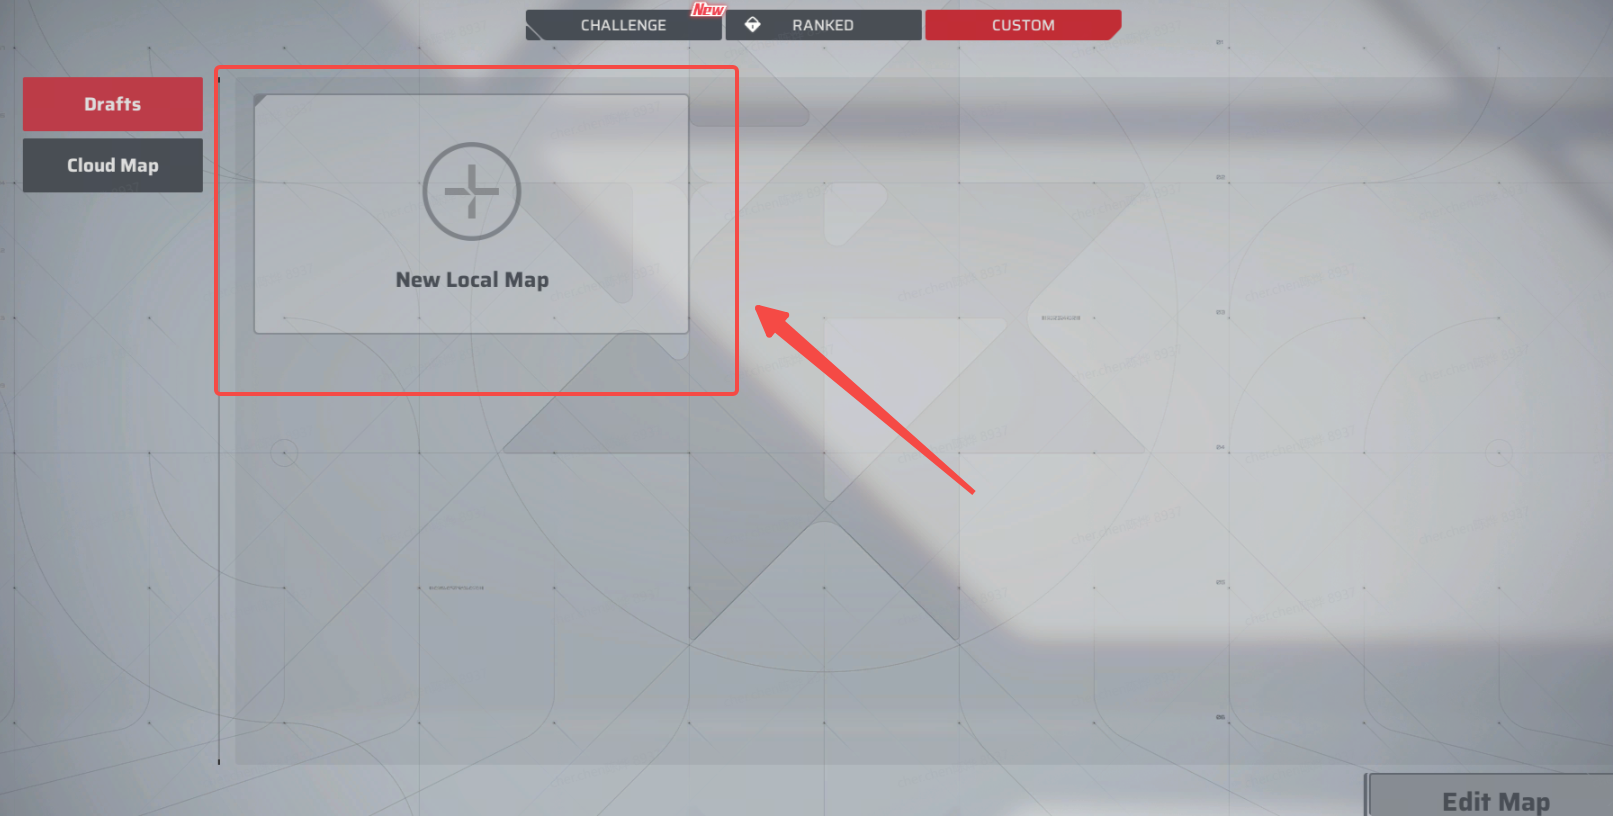
II. Create New Personal Building Map
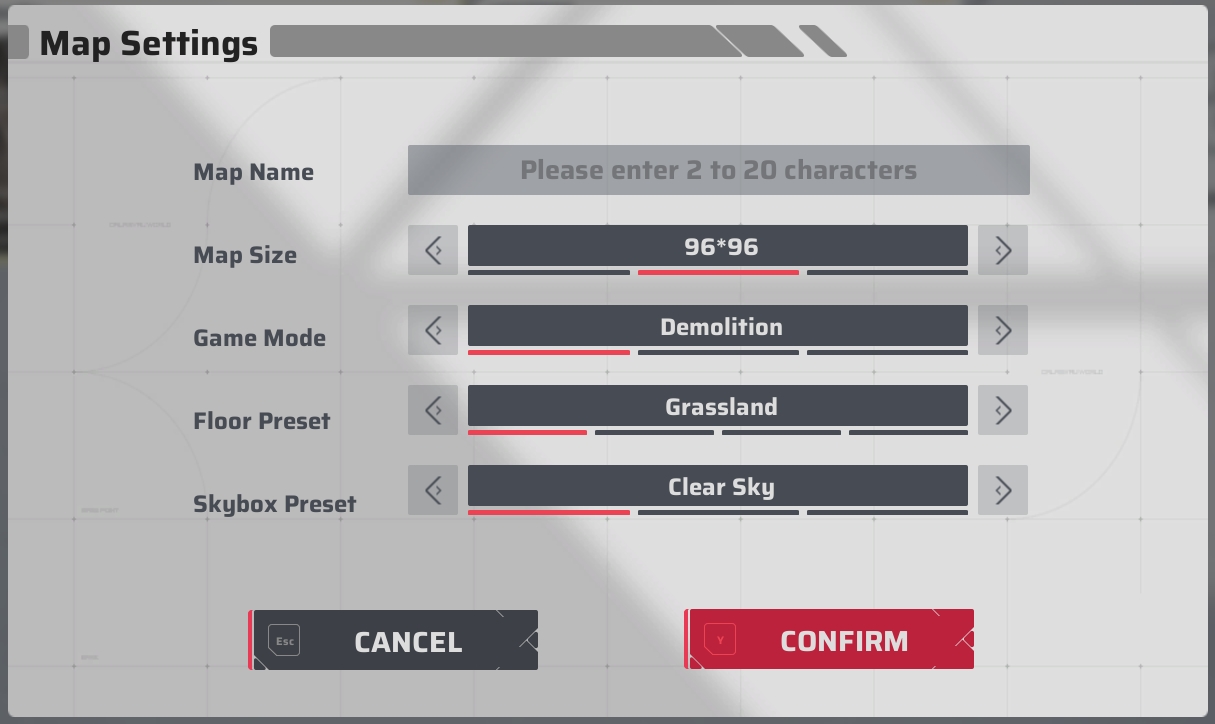
- Click [Drafts] → Click "New Local Map", select your desired preset map template, and confirm to start your custom building journey!
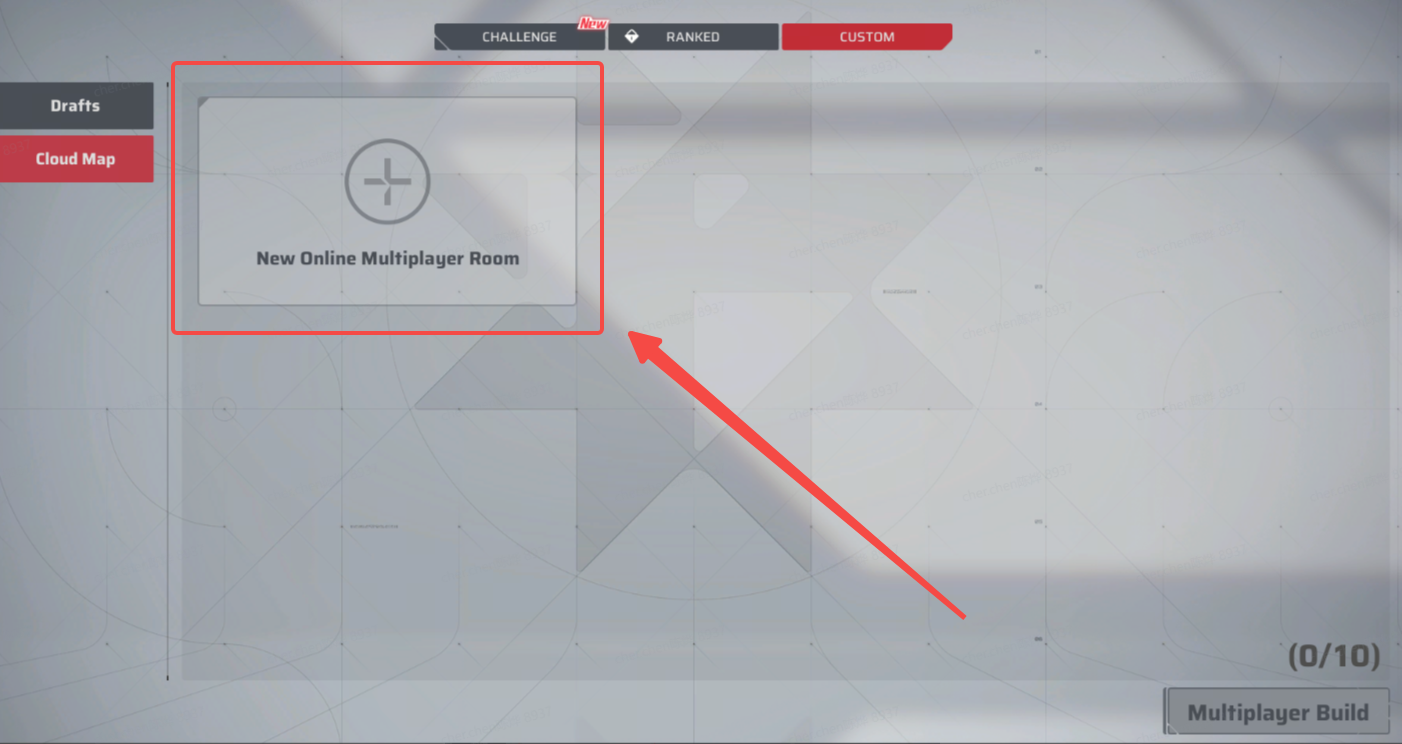
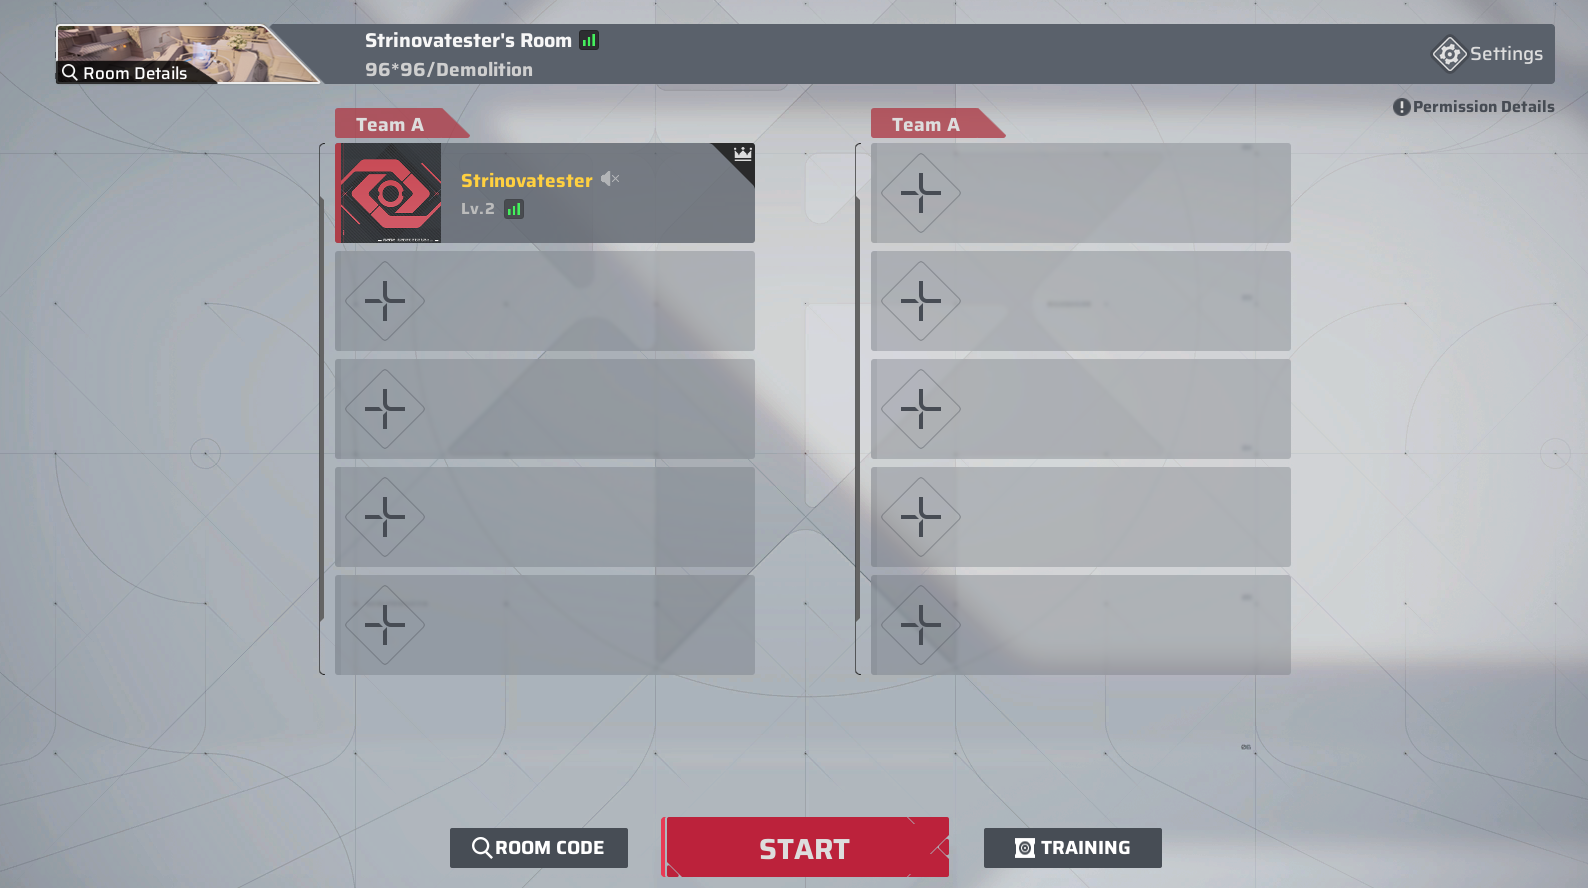
III. Create a Multiplayer Build Map
- Click [Cloud Maps] to create a new multiplayer building room. Select your desired preset map template, confirm your choice, and embark on a fun collaborative building journey with friends! (Every Navigator who joins your room will have permission to save this map. The co-built map will be saved in each player’s [Drafts].)
IV. In-Game Building & Saving
- Note: You must place all required modules for this mode completely to ensure the map can be submitted appropriately and played after saving.
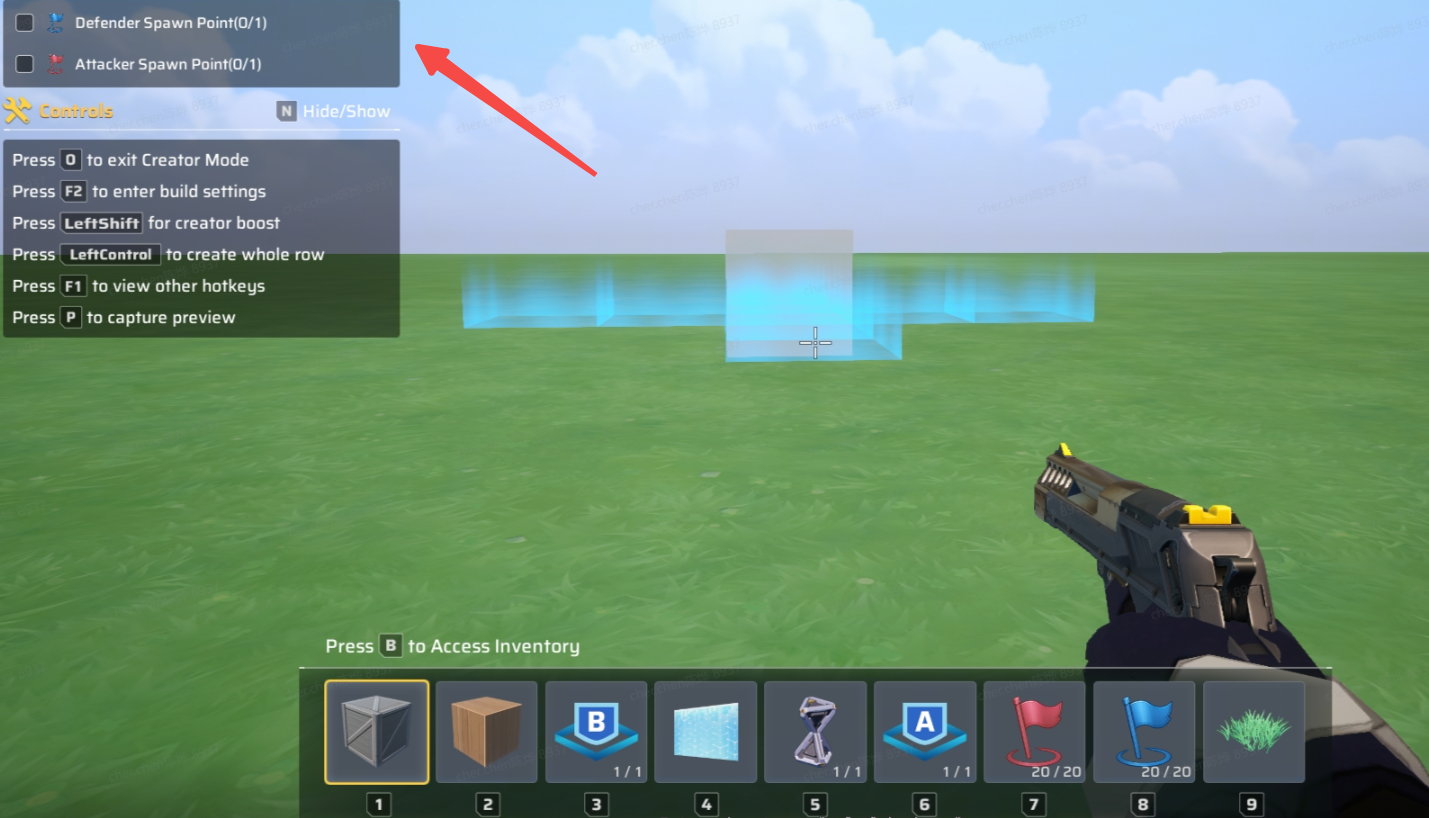
- Hotkey Tip: Press 'P' to capture a perfect cover shot for your map!
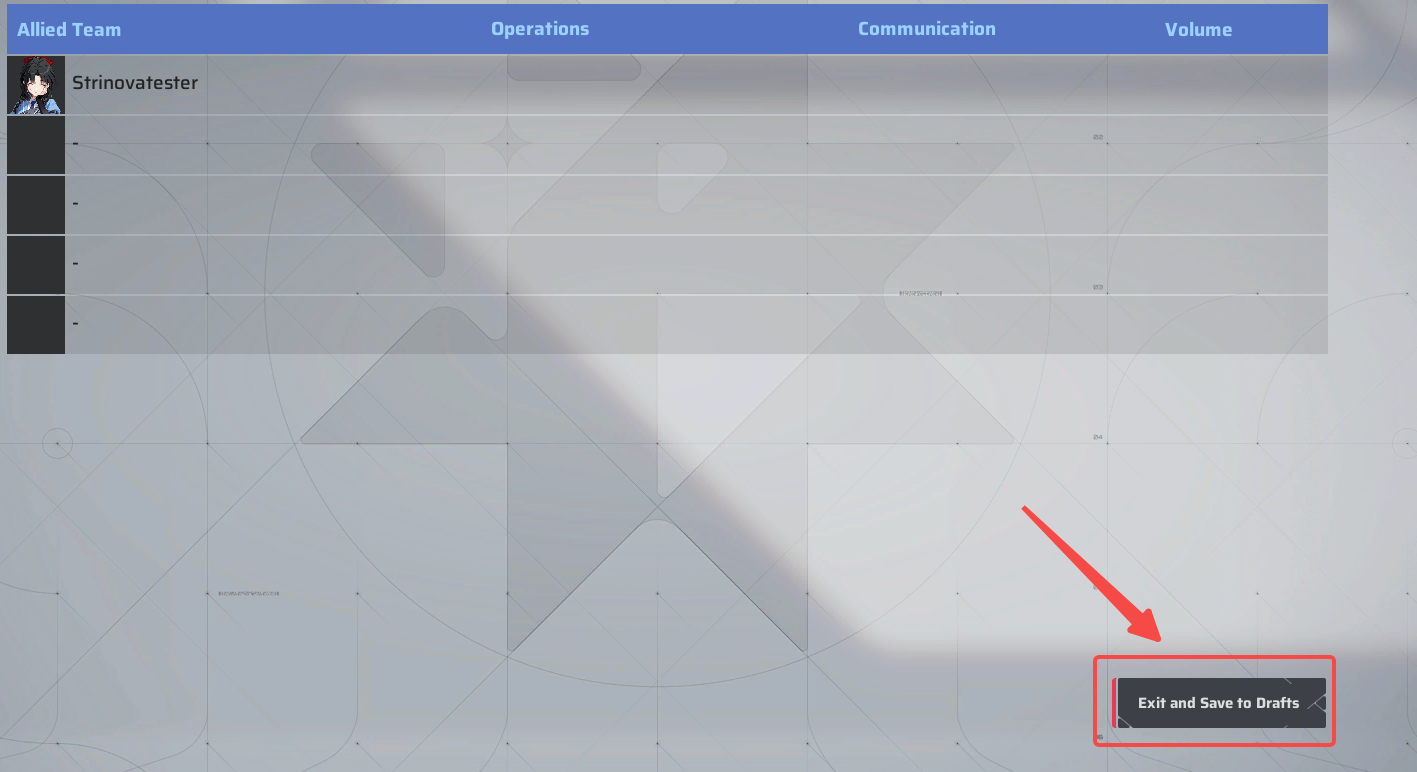
- Manual Save: When you press [ESC], remember to click [Save & Exit to Drafts] to store your map in [Drafts]. Please carefully preserve your creative work!
- Your building progress is periodically auto-saved to [Drafts], with notifications to keep you informed.
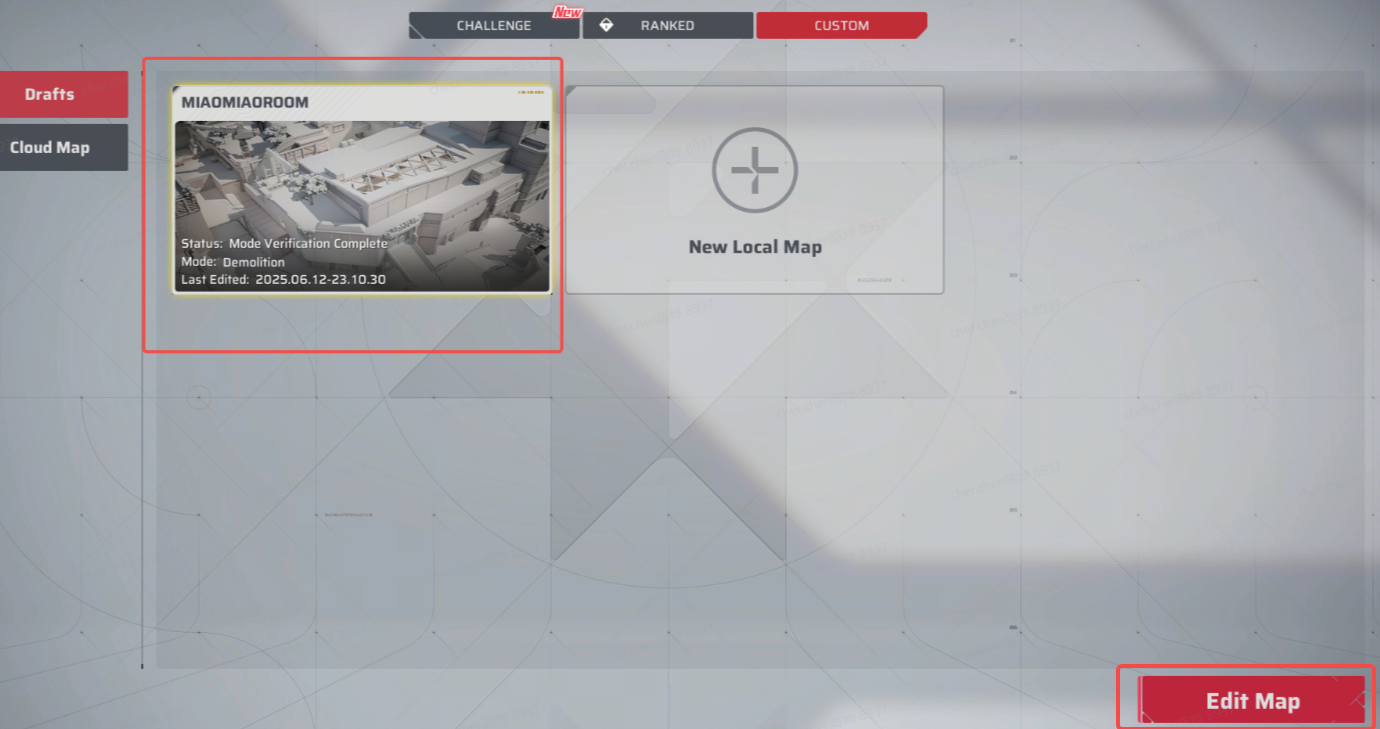
V. Edit Your Historical Maps
- In the [Drafts] section, select any historical map and double-click or tap the [Edit Map] button in the lower-right corner to reopen and continue editing. All modified versions will be automatically saved back to your [Drafts].
Words of Wisdom: "Navigators, you may edit your maps as often as you like. With patience and care, craft the perfect map of your dreams~"
- You can still invite friends to edit maps you've already submitted to the cloud collaboratively. All edited versions will be saved in your [Drafts]. To publish the updated map, you'll need to resubmit it from [Drafts]. (Note: Your submitted initially map won't be overwritten by the new edits~)
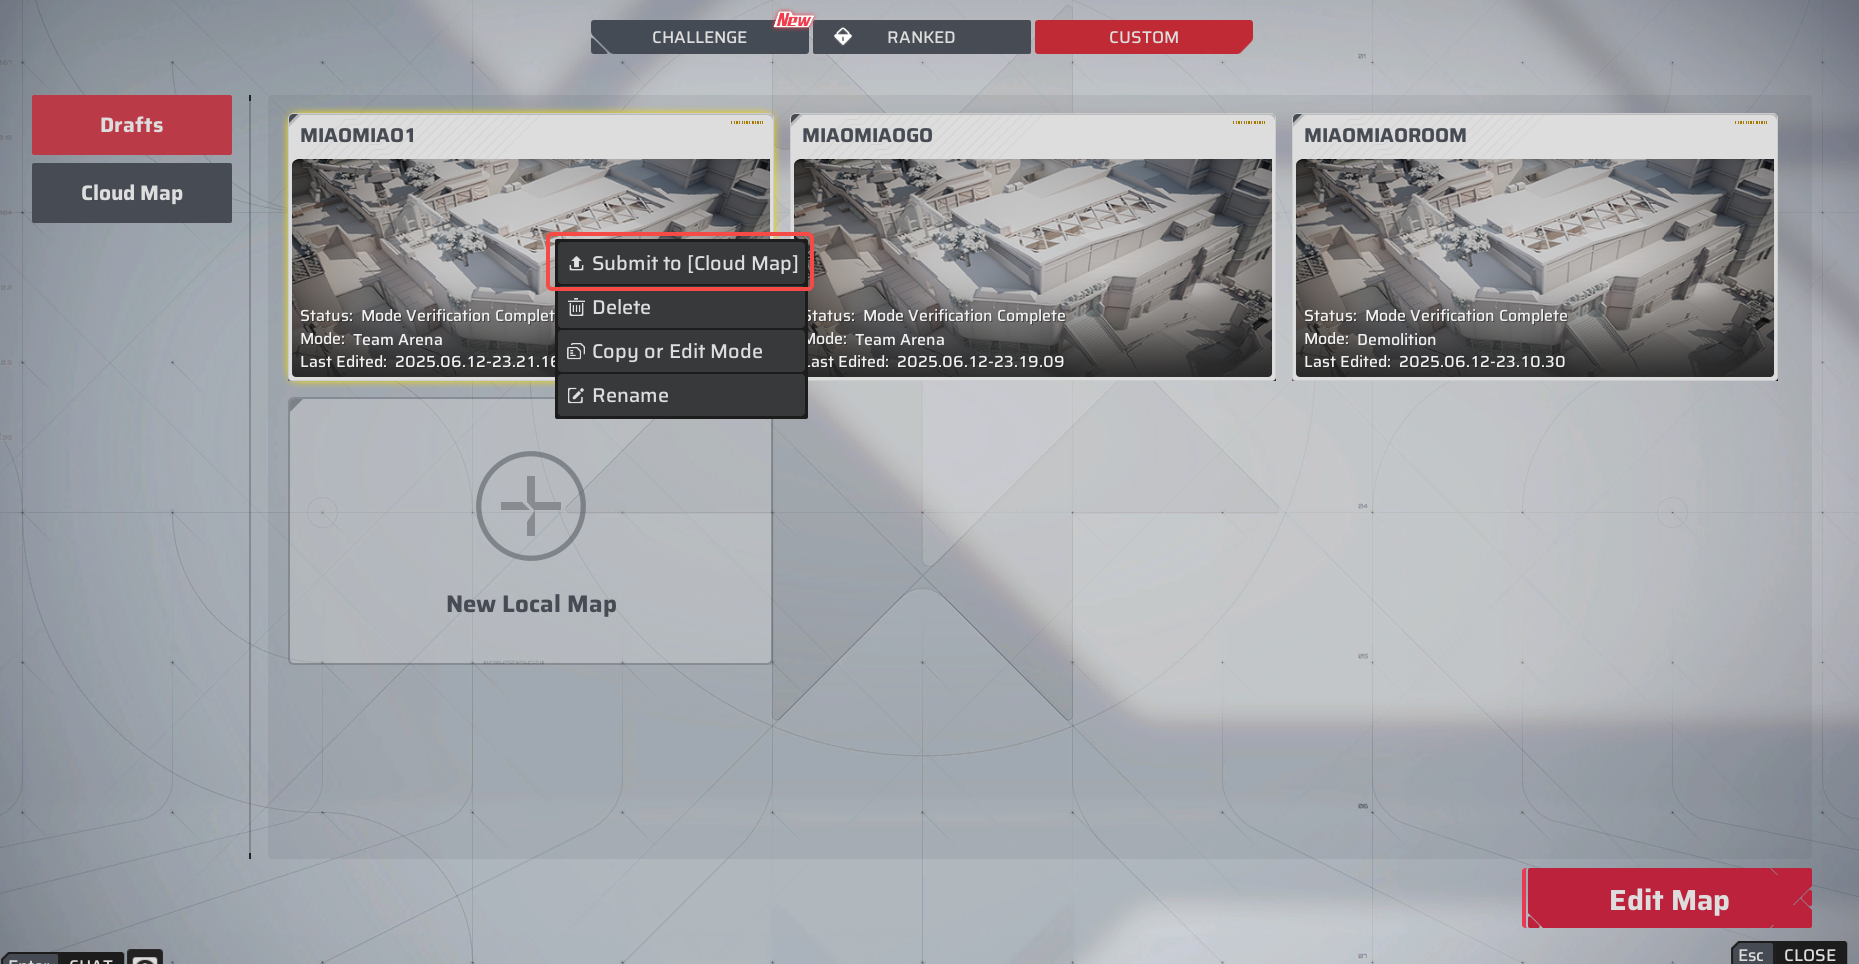
VI. Submit Map (Will Enter Review Process Upon Submission)
- Right-click and select [Submit] from the menu bar to upload your map from [Drafts] to the [Cloud]. (Only cloud-submitted maps can be played with friends!)
- After submission, your map will enter [Under Review] status. Review duration (typically within 24 hours) depends on map complexity and potential policy violations. Thank you for being so patient, Navigators!
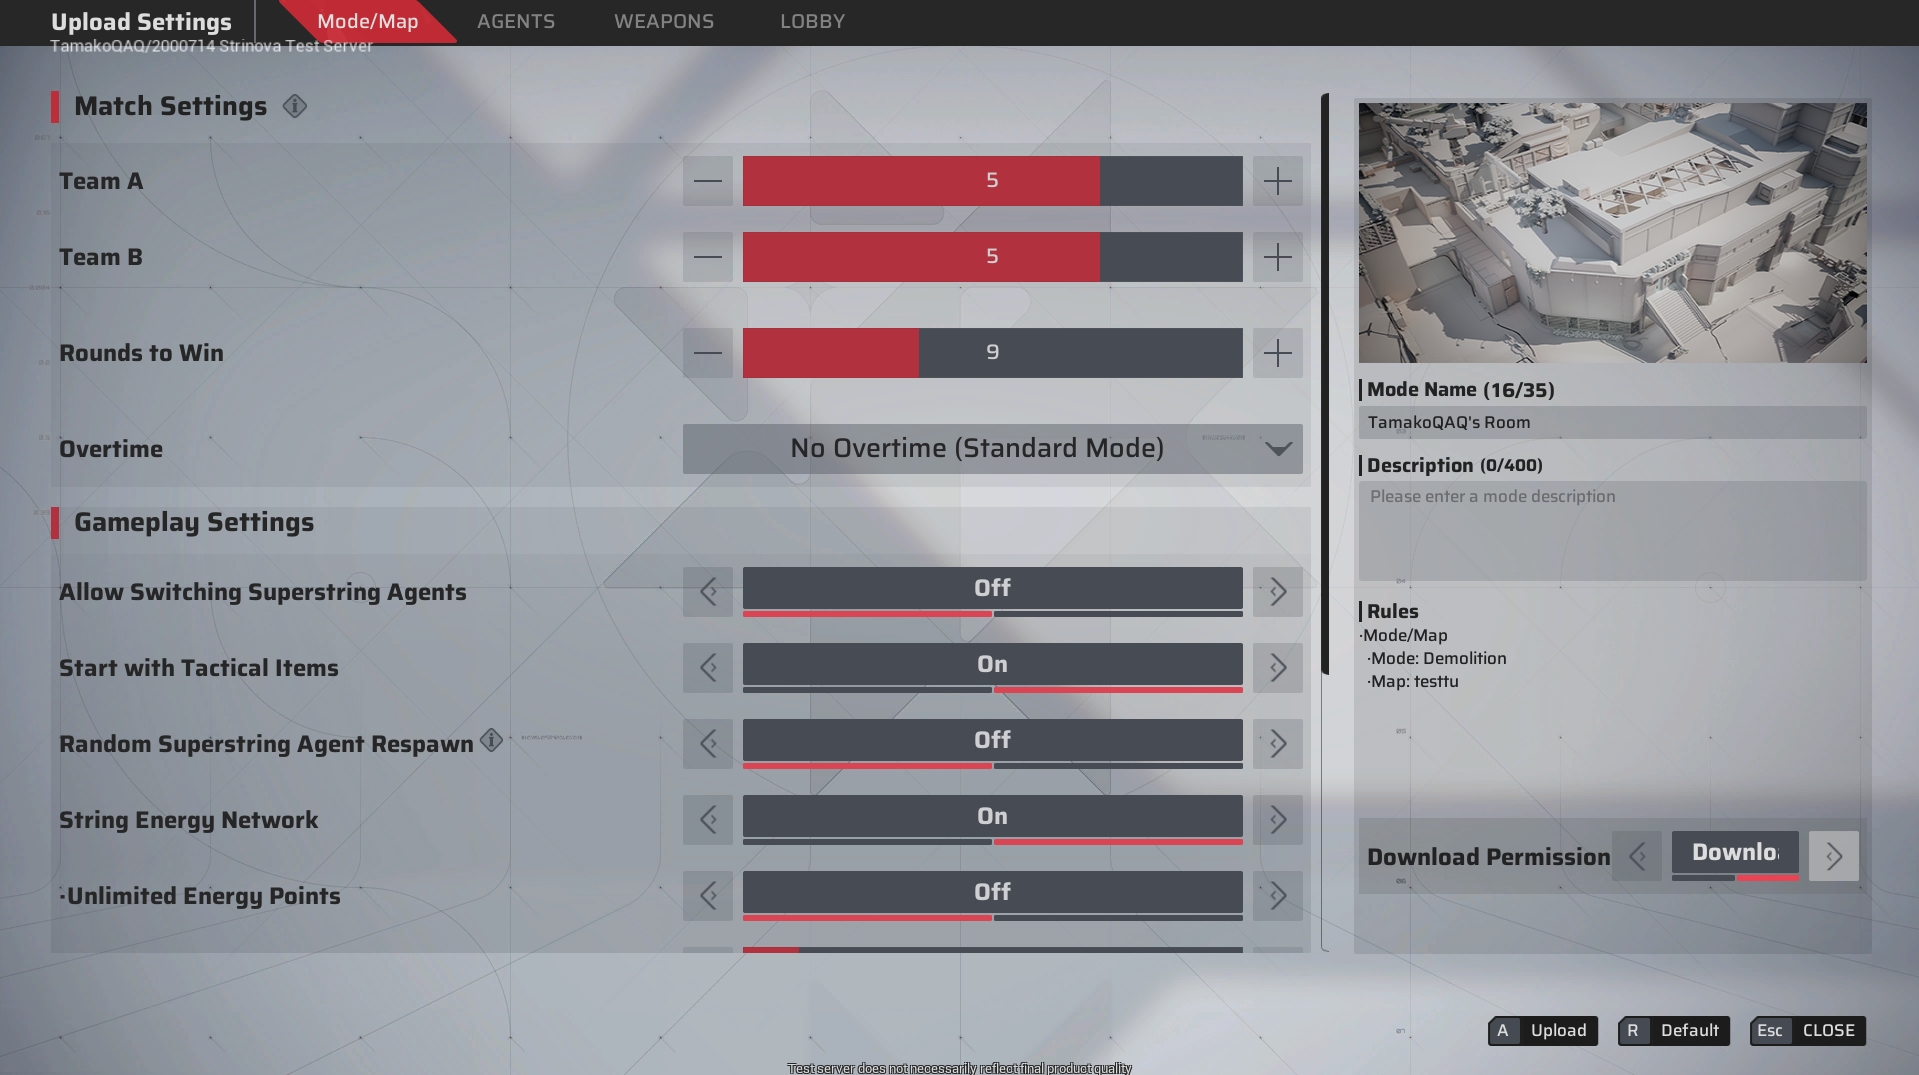
VII. Publish/Remove Maps
- Publish your maps in [Cloud] to the lobby of [Custom Map] for all players to experience;

- Set your rules!!! (Same process as custom room settings), enter the gameplay mode name and description for this map, then configure download permissions (when enabled, all Navigators can download your map).
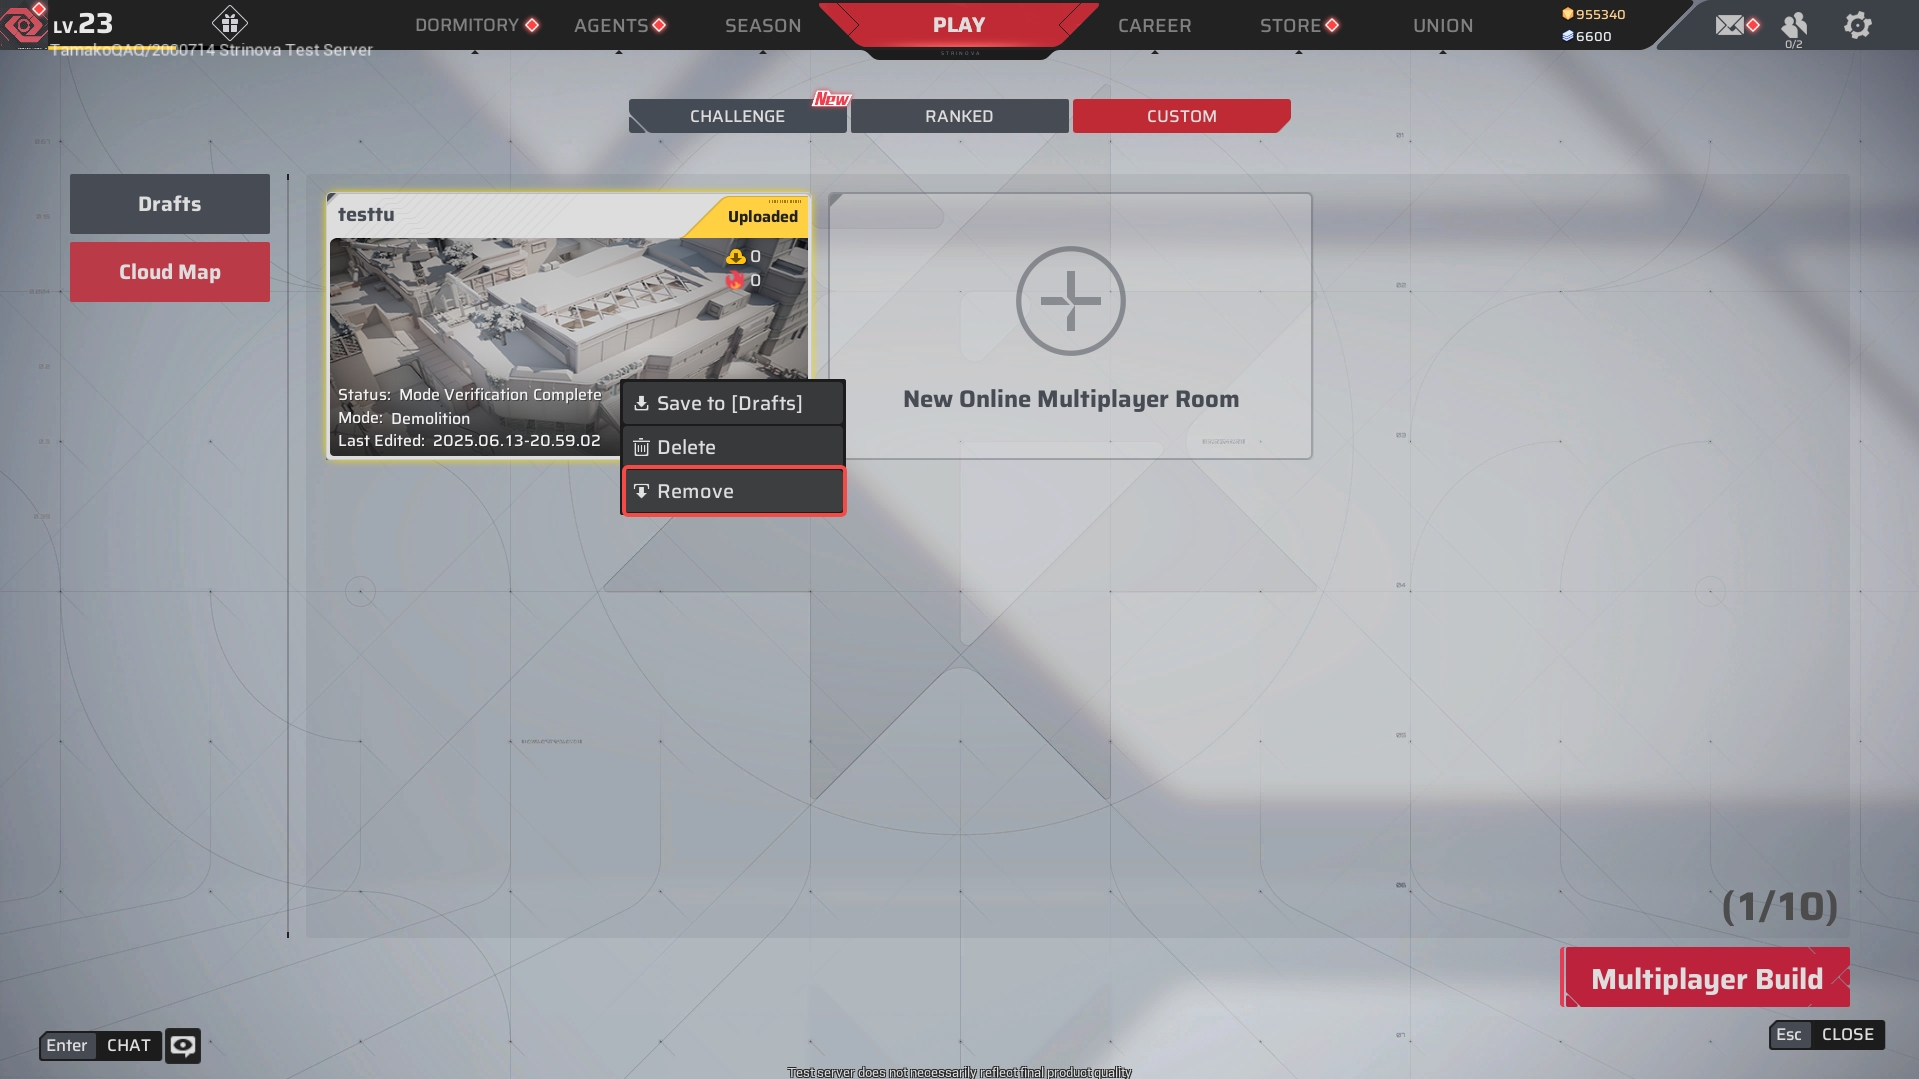
- Click [Cloud Map] - right-click the remove button in the menu bar to remove the map you have published.
VIII. Playtesting Maps
- To playtest your own map, you must first uploud it to the [Cloud].
- Go to [Create Room] - [Rules], then select the corresponding mode in [Mode/Map] to find your custom maps.


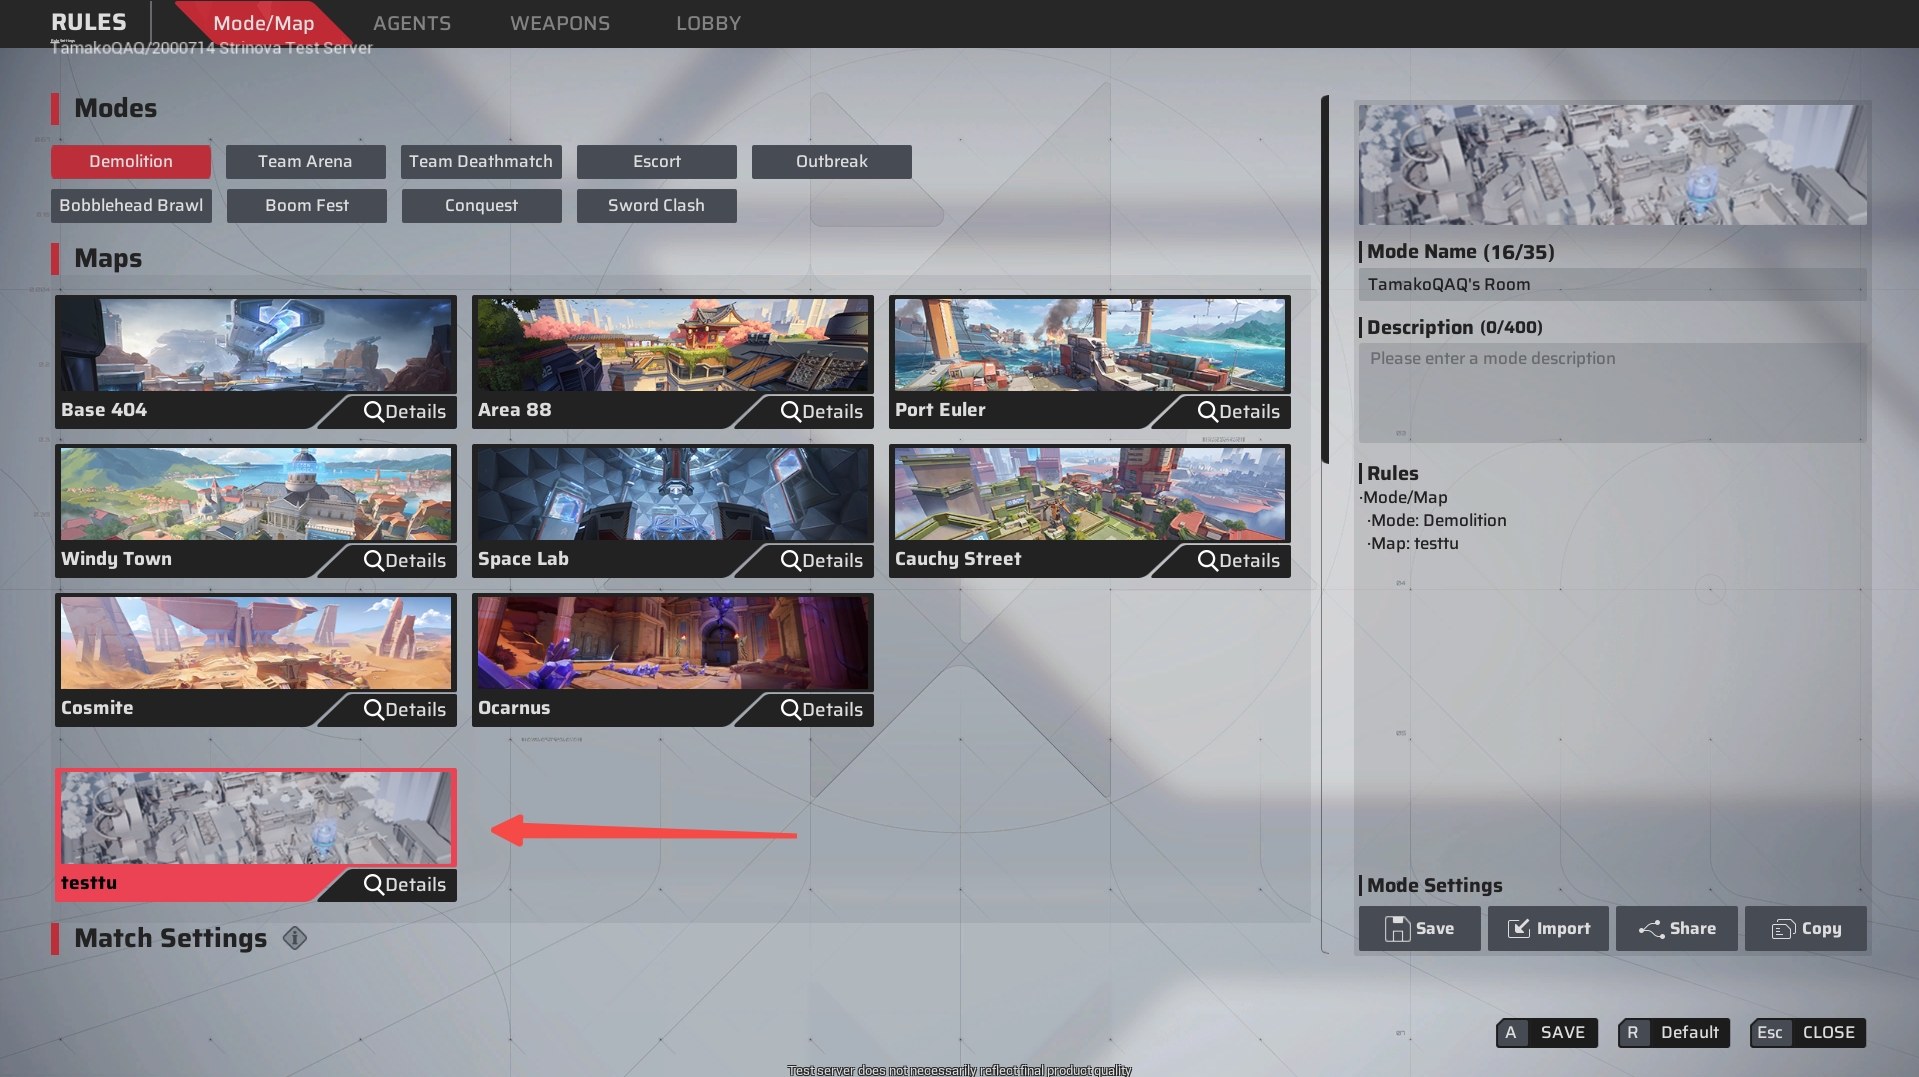
IX. Ways to Try Maps Published by Other Players
- Method 1: Directly find your favorite map - [Create Room]

- Method 2:
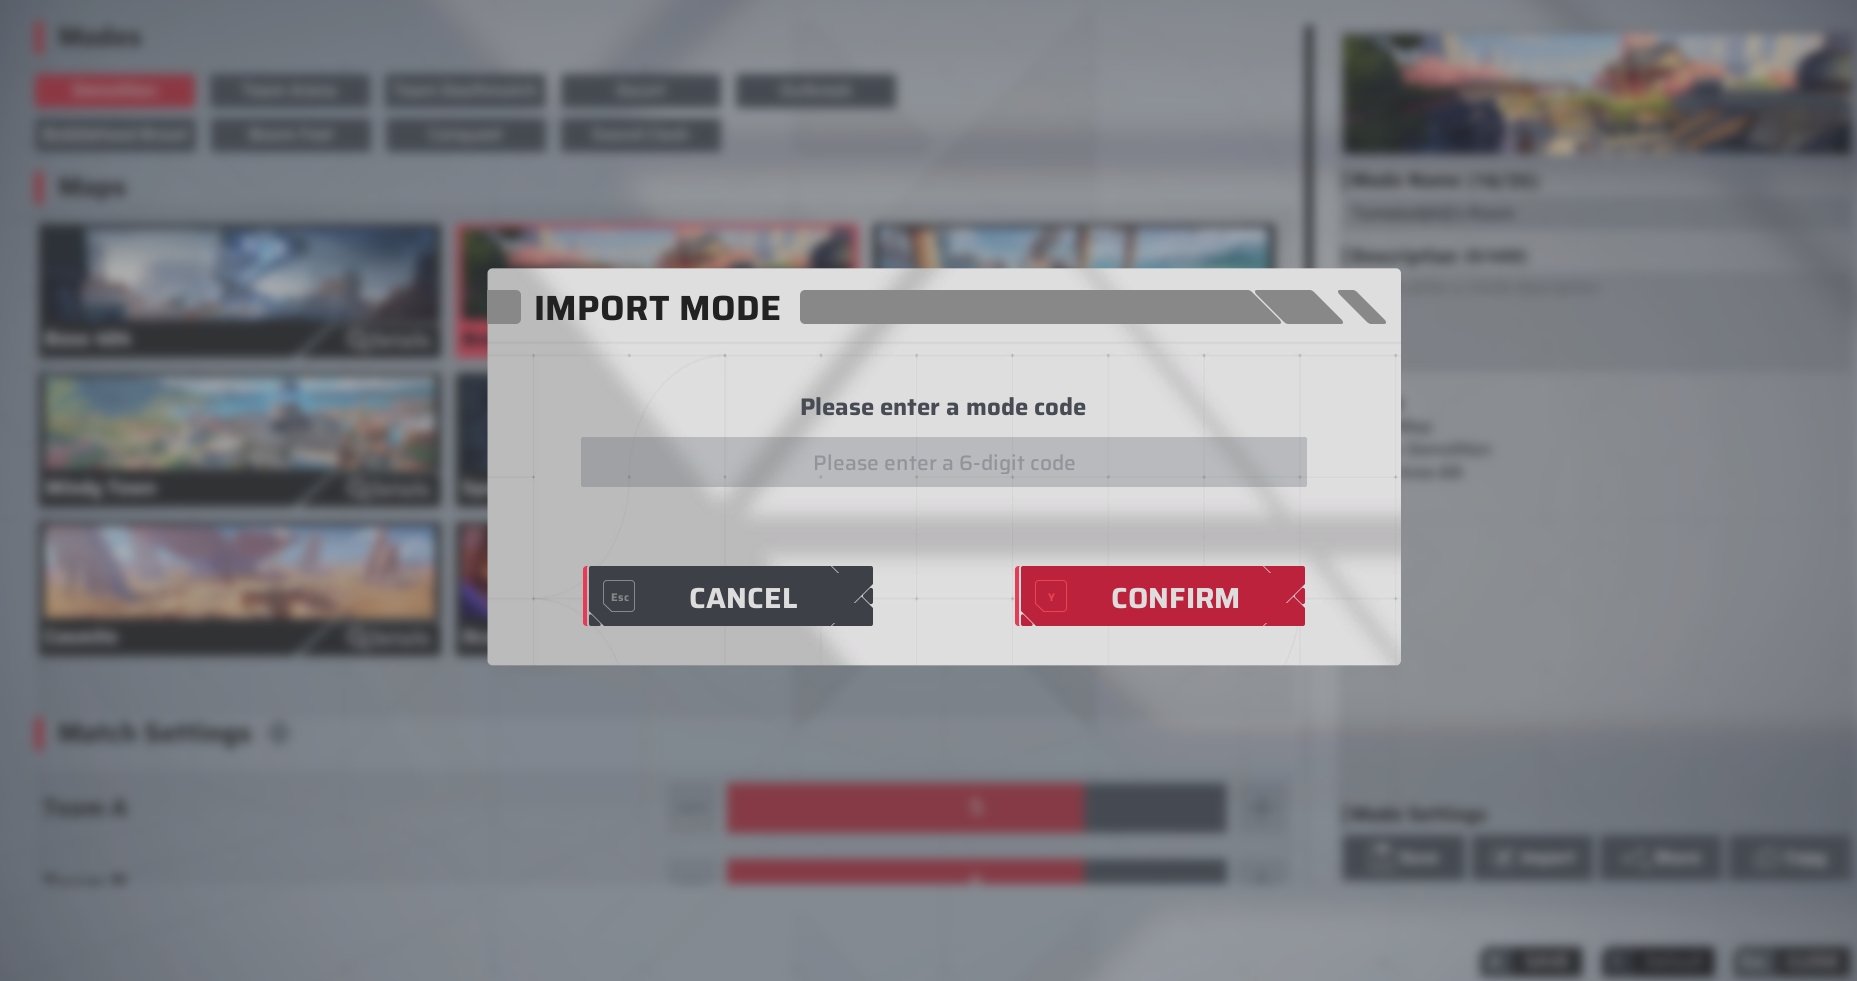
- Copy another player's Map ID

- In [Create Room] - [Rules], click the [Import] button to enter the Map ID from the [Custom Map] lobby and launch the room.


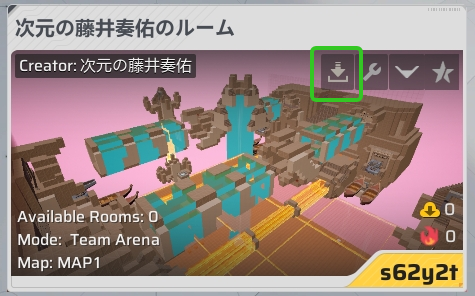
X. Download Other Player's Maps
- When a map published by another Navigator has download permissions enabled, you can save it to your [Drafts]:
XI. Map Import Tutorial
- In your Files , enable the option to show hidden items.
- Click the "View" tab → "Show" → check "Hidden items".
- Launch the Strinova game client, and go to Custom → [Map Workshop].
- In the [Draft] tab, click [Import Map] at the bottom right.
- In the pop-up file selection window, locate the UGCMap folder. The default path is:
- C:\Users\[YourComputerUsername]\AppData\Local\CalabiYau\Saved\UGCMap
- In the opened folder, select the map file you want to import (file format: .DATA), then click [Open] to import.
- Once the import is complete, you will see the map appear in your Draft Box. You can now continue editing and creating, meow~!